Polkadot Developer Signer: How to Add Your Ledger Account Print
Modified on: Fri, 19 Dec, 2025 at 1:22 PM
This article remains available for reference but is no longer updated or maintained.
Please use the information at your own discretion and risk.
For more details, refer to the official annoucenment.
‼️ IMPORTANT

The Polkadot Developer Signer is an account manager meant for power users and developers. There are several user-friendly browser extensions funded by the Polkadot Treasury that support a lot of features right from the extension. Discover them in this article.
We highly recommend that you add your accounts in the browser extension, as it has many advantages:
1. It provides better security than using the Web UI directly.
2. Your browser won't "forget" your accounts if its cookies are cleared.
3. It allows you to interact with any Web 3.0 compatible site in the Polkadot ecosystem.
4. The extension recognizes all known Polkadot scams and alerts you when you try to visit a known scam site. This will help you protect yourself and your funds.
If you haven't installed the Polkadot Developer Signer yet, you can find download instructions here.
ℹ️ GOOD TO KNOW

The Polkadot Developer Signer is an account manager, not a wallet. You will still need to use Polkadot-JS UI to interact with your accounts and see your balance.
How to add your Ledger account through the Polkadot Developer Signer
‼️ IMPORTANT

Ledger is phasing out support for the Ledger Nano S. Your funds remain safe, but upgrading is recommended to ensure compatibility with future Polkadot updates.

Notice that other Ledger models (e.g., Ledger Nano S Plus) are not affected.
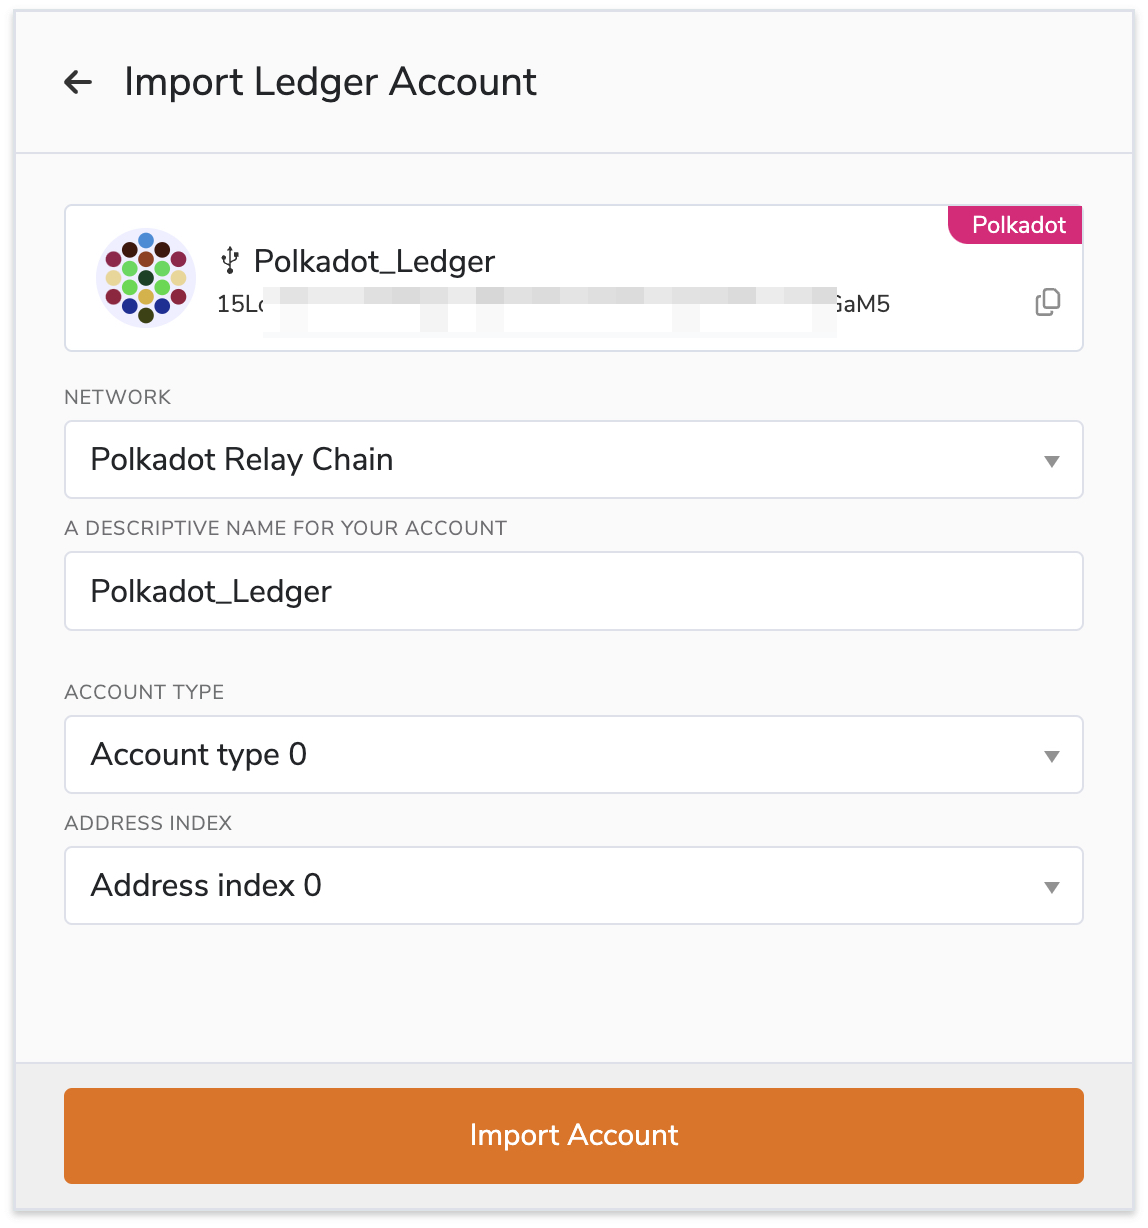
2. Open the Polkadot Developer Signer, go to "Settings" > "Ledger app," and ensure you have selected the desired option on the drop-down menu. Select whether you want to add an account from the Generic Polkadot app or migrate your funds using an account from the Polkadot Migration app.


8. Finally, click on Import Account.
⛔ READ THIS FIRST!


If you choose to change the Account Type and Index, make sure to note them down for the future. Every Account Type and Index combination will produce a different account address. If you need to re-add your Ledger account in the future, you will need to select the same Account Type and Index in order to access the same account.
‼️ IMPORTANT


If you get an error "No device selected", check your browser settings. Go to:


"Settings" > "Privacy and Security" > "Site Settings" > "Additional permissions" > "USB devices"


and make sure "Sites can ask to connect to USB devices" is selected. Then try again.


If this doesn't help, please ensure that your browser has permissions to access USB devices, in particular if it is running as a snap such as Brave on Ubuntu.  As a workaround, uninstall the default version and reinstall it from the official package repositories.
If you prefer visual instructions, you can check this video which also shows an example of how you can stake using your Ledger account. This video covers Ledger accounts in general, but you can skip to the 2:30 timestamp in the video to view the instructions on how to add your Ledger account in the Polkadot Developer Signer:
Connect Ledger to Polkadot JS UI
