Staking Dashboard: How to Change the Reward Destination Print
Modified on: Wed, 11 Feb, 2026 at 3:35 PM
This article remains available for reference but is no longer updated or maintained.
Please use the information at your own discretion and risk.
For more details, refer to the official annoucenment.
This article explains how to use the Staking Dashboard to change the destination account of your staking rewards.
How to change the destination account of your staking rewards
1. First, connect your account to the Staking Dashboard.
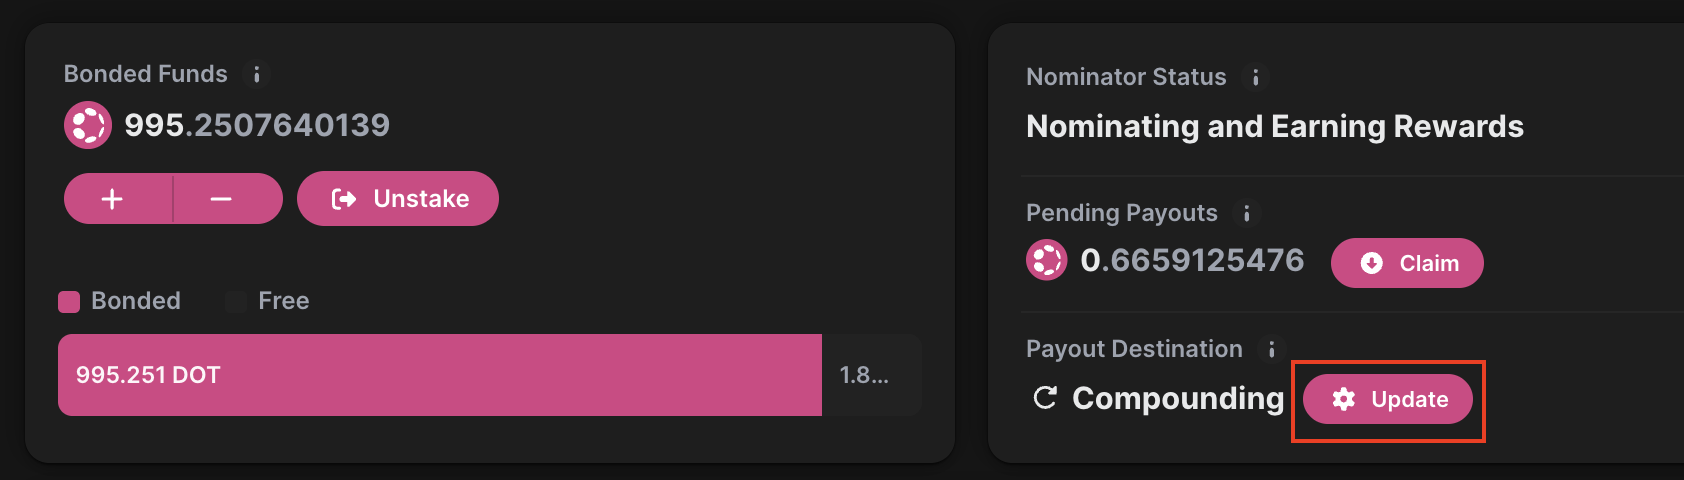
2. Navigate to the "Nominate" tab. Click on the "Update" button under "Payout Destination":
3. A new screen will appear where you can choose your reward destination:
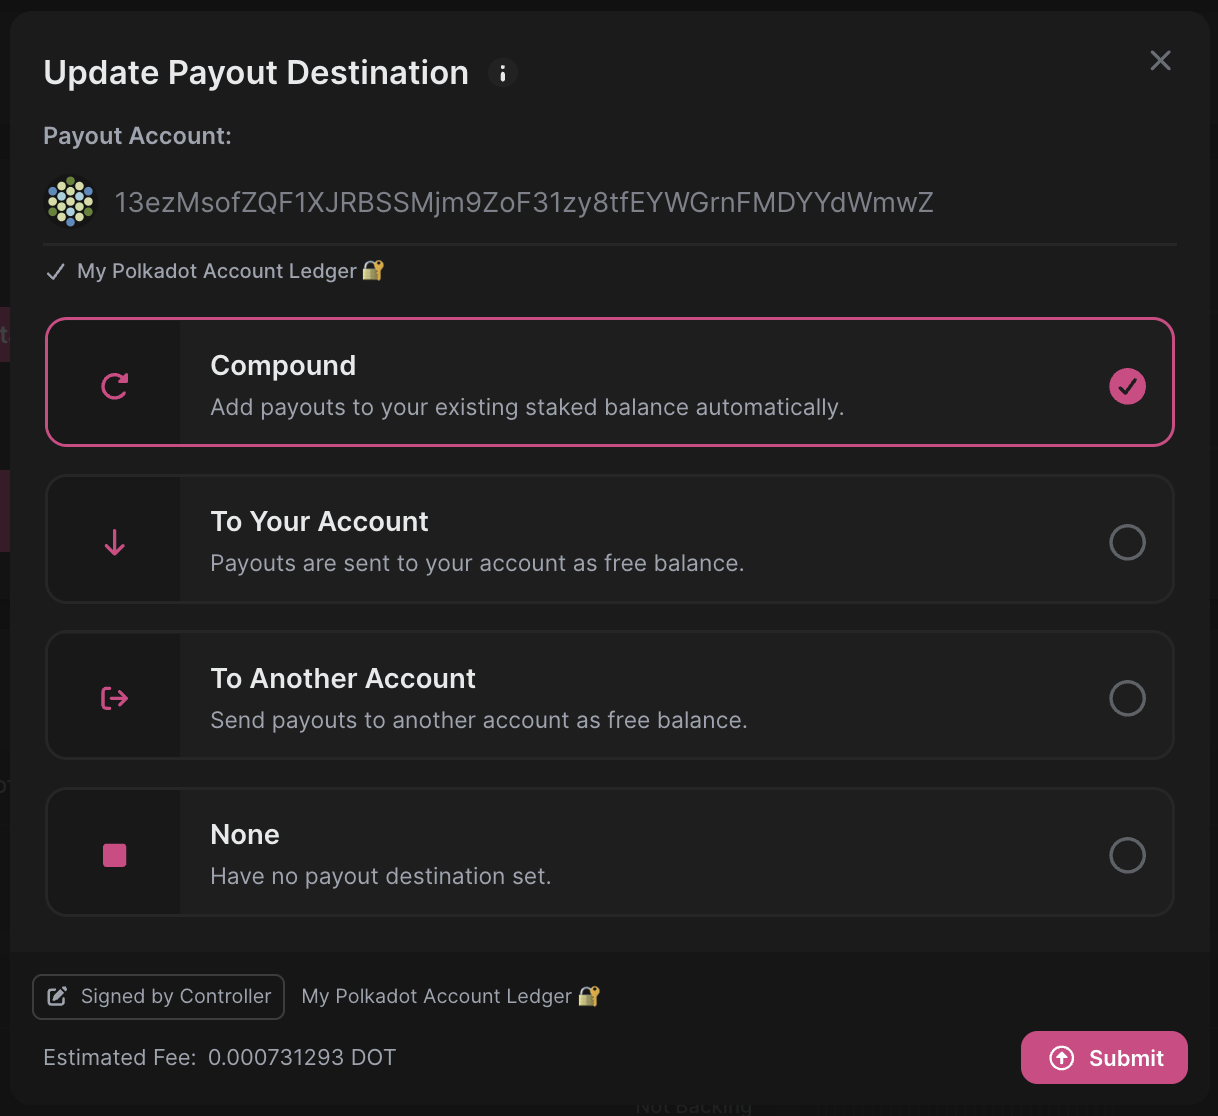
You can choose between four options:
- Compound: Send your staking rewards to your stash and bond them so your stash keeps growing.
- To Your Account: Send your staking rewards to your stash without bonding them so they remain transferrable, and you can send them out of your account anytime.
- To Another Account: Send your staking rewards to the account you paste.
- None. Set no payout destination account.
⚠️ ATTENTION

Make sure that the balance of the account that receives staking rewards is above the Existential Deposit. Staking reward sent to an empty account can be lost if the reward itself is below the Existential Deposit.
Once you choose an option, you will see the estimated transaction fee for the change.
4. Choose the option you want and click "Submit" to sign the transaction:
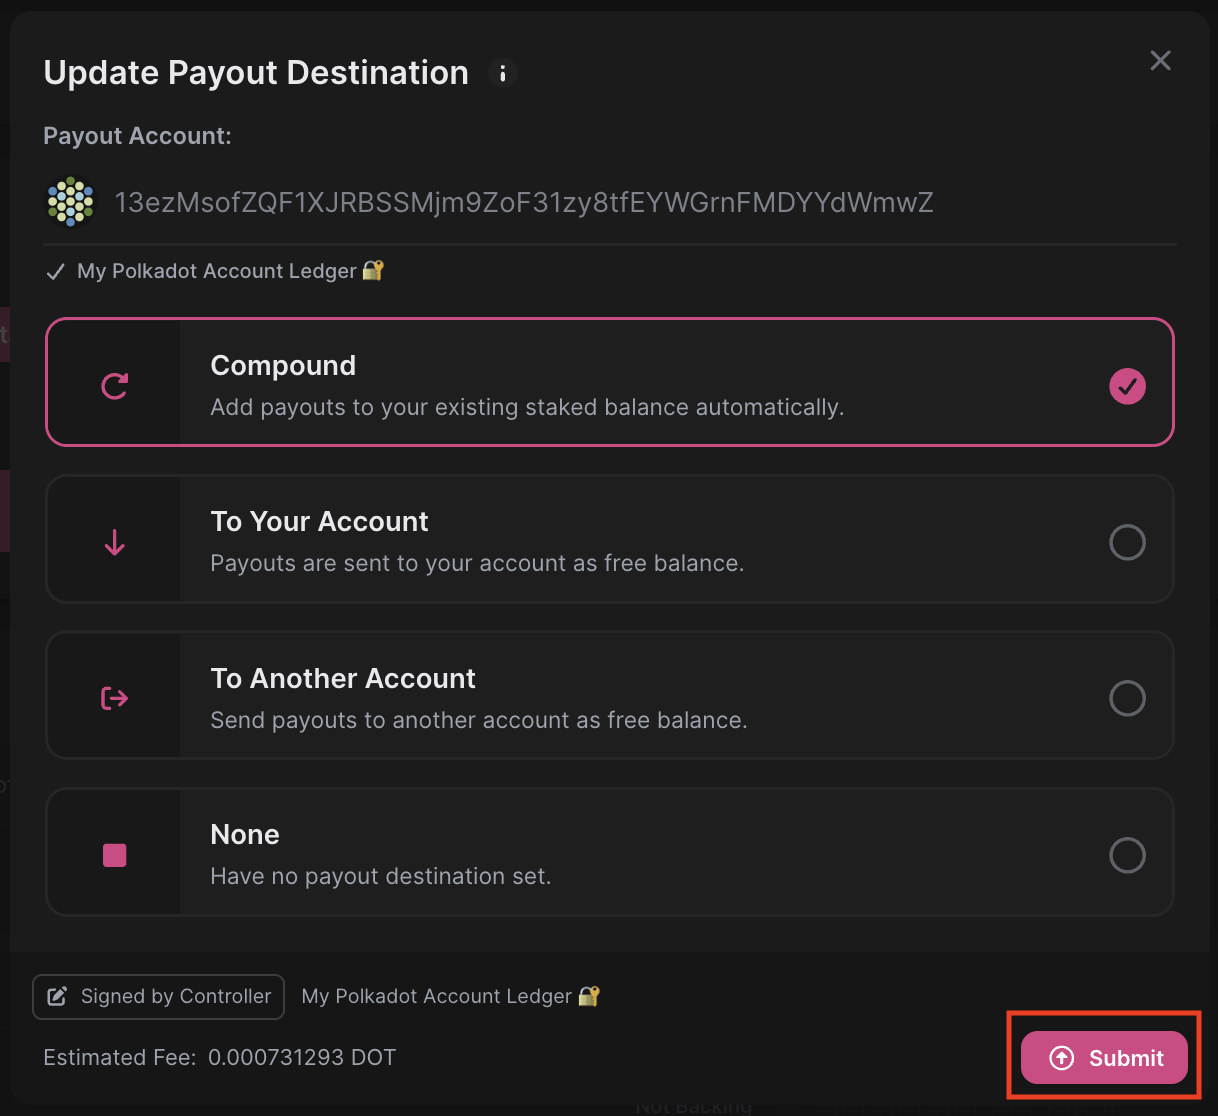
That's it! You've changed your reward destination. This change will take effect in the next two eras.
