Polkadot Developer Interface: How to Create an Account Print
Modified on: Tue, 10 Feb, 2026 at 1:47 PM
‼️ IMPORTANT

Polkadot Developer Interface (Polkadot-JS UI) is a web wallet meant for power users and developers. For everyday use, there are several user-friendly wallets funded by the Polkadot Treasury that support a plethora of features and platforms. Discover them in this article.
In this article, you will learn how to create a new account in the Polkadot Developer Interface. For most users, we strongly recommend using other wallets instead:
Where to Store DOT: Polkadot Wallet Options
The Polkadot Developer Signer has many advantages:
- It provides better security;
- Your browser won't "forget" your accounts if its cookies are cleared;
- It allows you to interact with any Web 3.0-compatible site in the Polkadot ecosystem;
- The extension recognizes all known Polkadot (and not only) scams and alerts you when you access a phishing site. This will help you protect yourself and your funds.
How to Create an Account on Polkadot Developer Interface
1. On the Polkadot Developer Interface, navigate to the Settings tab. In the account options, allow local in-browser account storage and click Save:

2. Navigate to the "Accounts" page and click on the "+ Account" button:

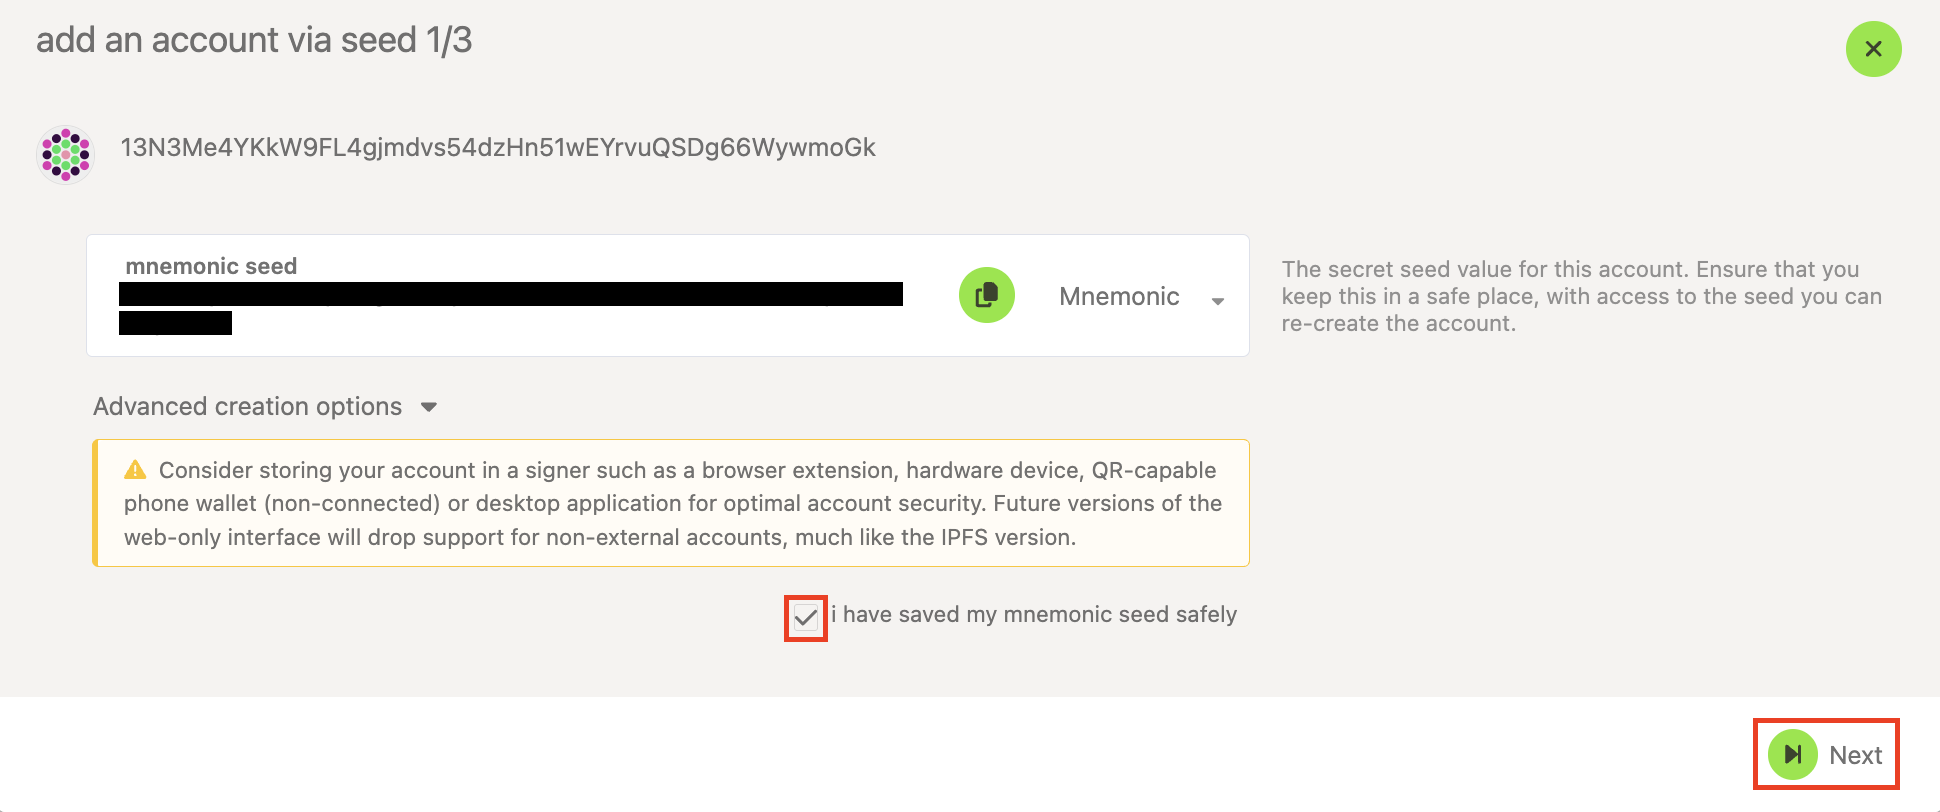
3. You'll see a 12-word mnemonic phrase. Save it safely and check the box saying you have done so, and click "Next":
⚠️ ATTENTION

Make sure to save your mnemonic phrase now, as there is no way to view it after the account is created.

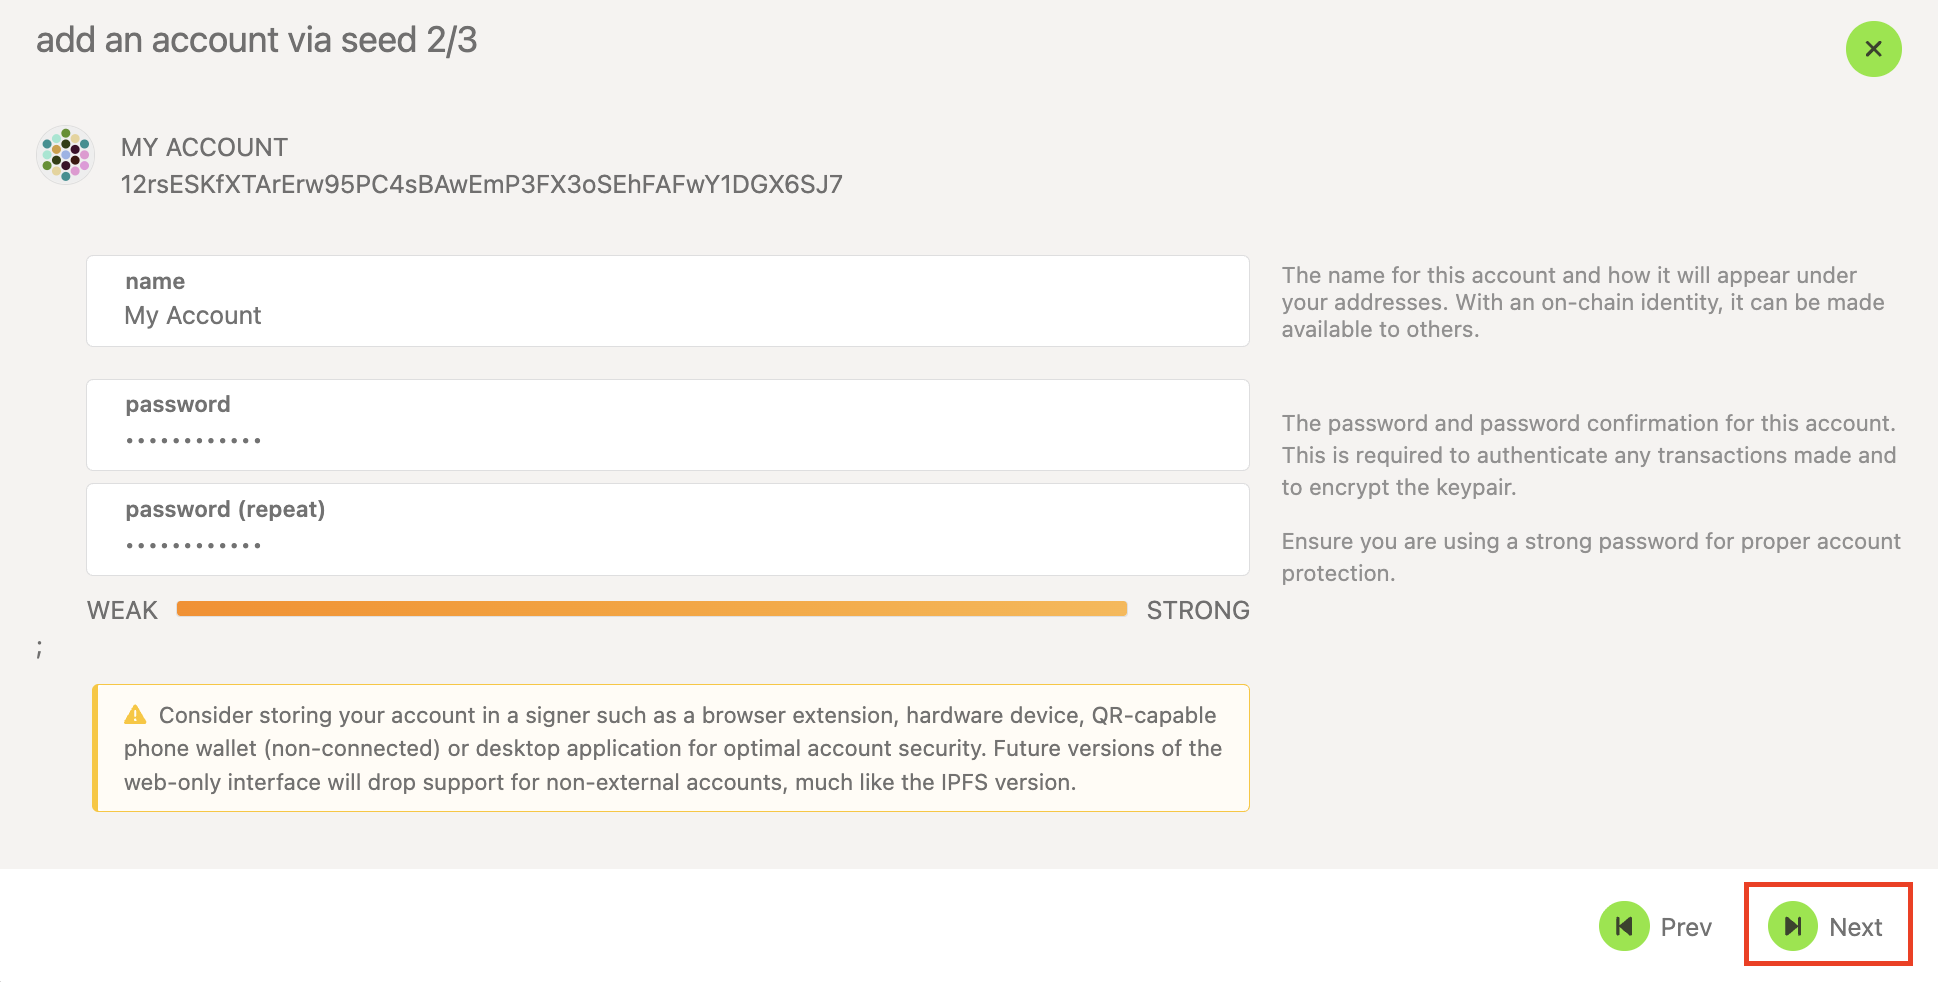
4. Give your account a descriptive name and a good password, and click "Next":
⚠️ ATTENTION

Your password does not protect your mnemonic phrase! It is only used to encrypt your account locally on your device. The mnemonic phrase alone can give full access to your account, which is why you can use your mnemonic phrase to restore the account if you forget your password. As a result, an attacker doesn’t need to know your password to compromise your account, just your mnemonic phrase

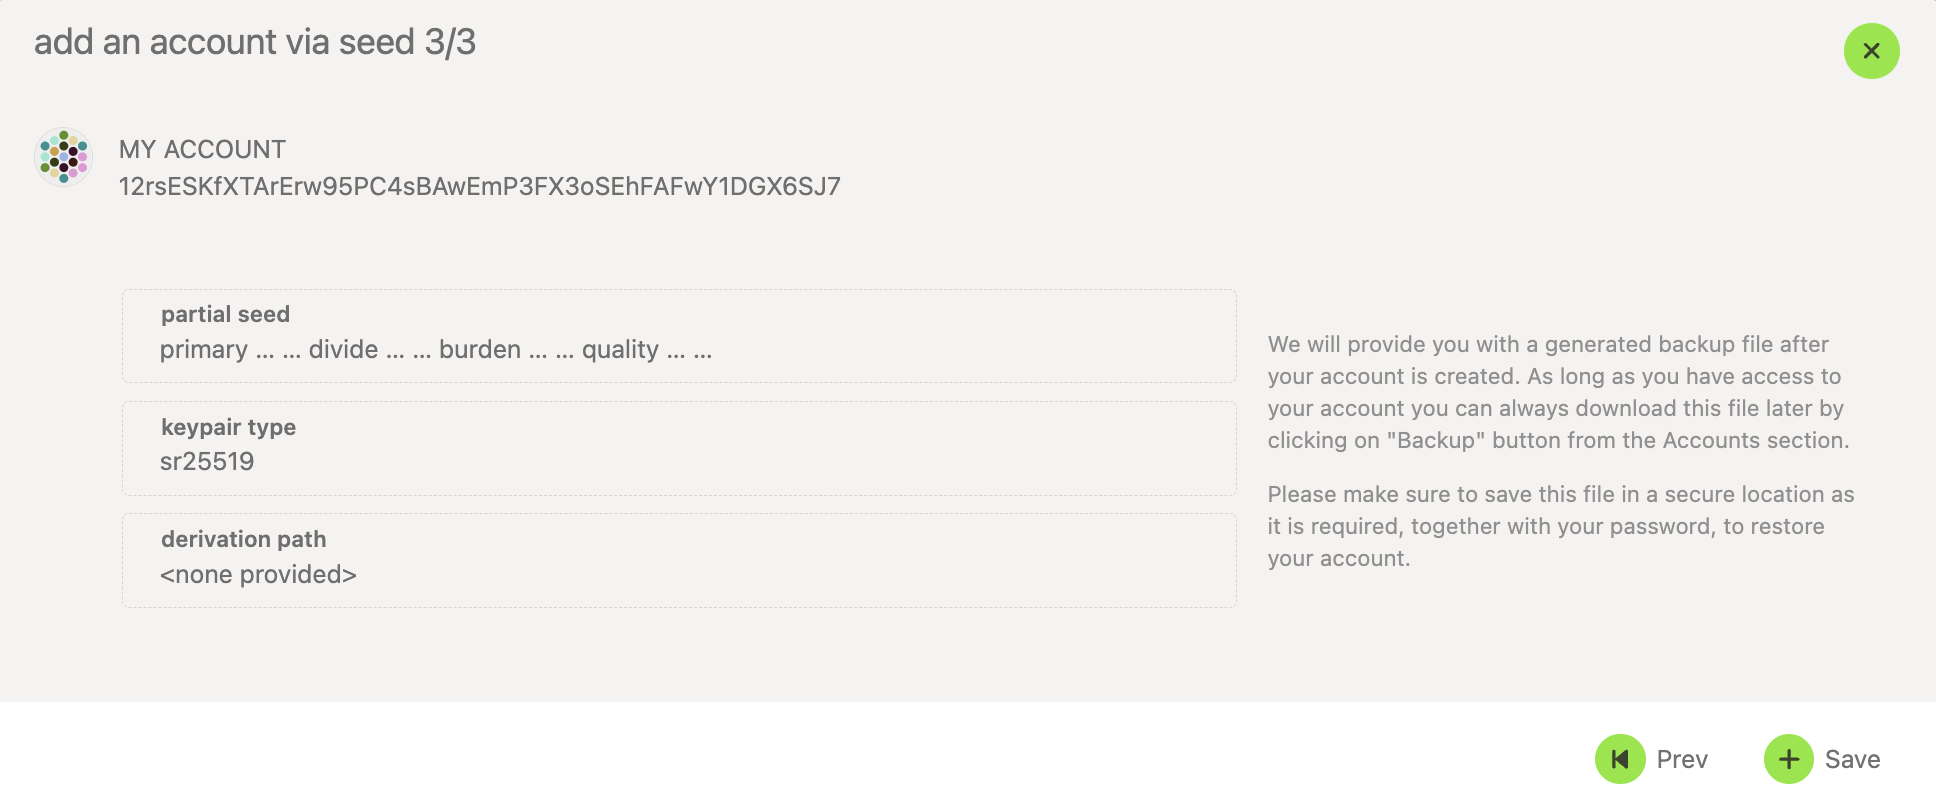
5. Review the details, and click "Save". This will also download the JSON backup file for the account on your computer:

6. Your JSON backup file will have the name of your account and will go to your default download folder. Unless you rename it, it will be named like this:
12rsESKfXTArErw95PC4sBAwEmP3FX3oSEhFAFwY1DGX6SJ7.json
Your account has been successfully created, and you will see it listed on your "Accounts" page.
If you are more of a visual type, check this video guide:
Creating Accounts, Downloading JSON Backup Files, and Changing Passwords on the UI and Extension
Was this article helpful?
That’s Great!
Thank you for your feedback
Sorry! We couldn't be helpful
Thank you for your feedback
Feedback sent
We appreciate your effort and will try to fix the article
Disclaimer: We always strive to provide you with the best support we can and we take all care to ensure that our instructions are accurate and concise. However, following these instructions properly, as well as the general management of your accounts and funds, is ultimately your responsibility. Web3 Foundation cannot be held liable for any accidental loss of funds or any other damage you might incur.
